3.20. Additional Settings
3.20.1. Rsyslog Forwarding
Rsyslog forwarding can be configured in Settings > System >
Rsyslog. To add a forwarding configuration for local log
sources, click Add Rsyslog Forwarding.
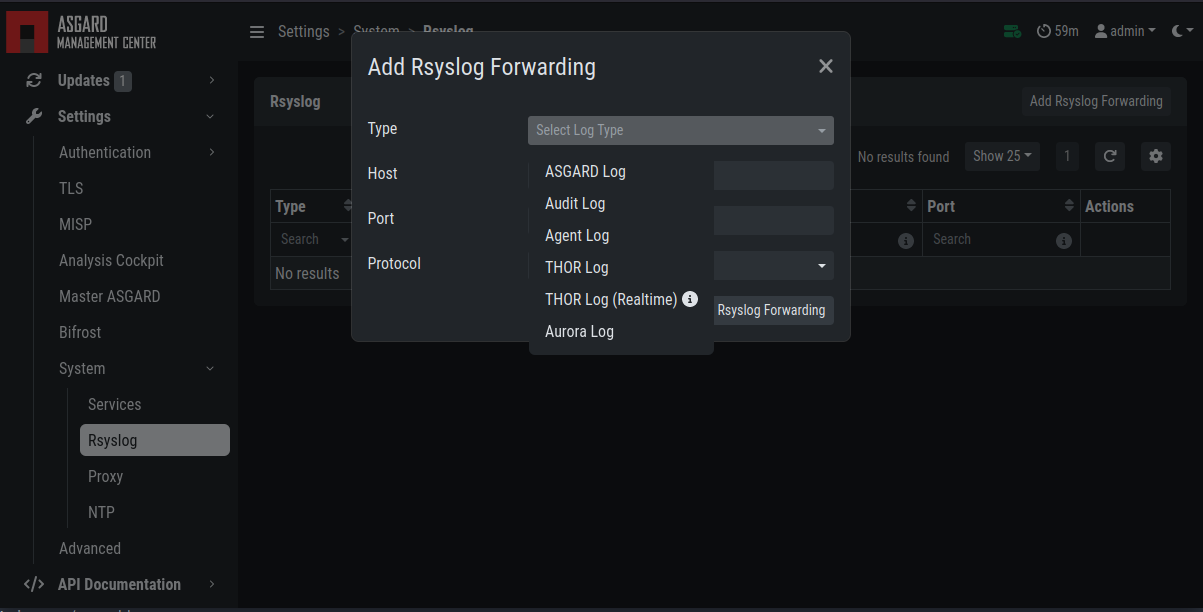
The following log sources can be forwarded individually:
Log |
Description |
|---|---|
ASGARD Log |
Everything related to the ASGARD service, processes, tasks, and scan jobs |
ASGARD Audit Log |
Detailed audit log of all user activity within the system |
Agent Log |
All ASGARD Agent activities |
THOR Log |
THOR scan results |
THOR Log (Realtime) |
THOR scan results [1] |
Aurora Log |
Aurora logs |
3.20.2. TLS Certificate Installation
Instead of using the preinstalled self-signed TLS certificate, users can upload their own TLS certificate for ASGARD.
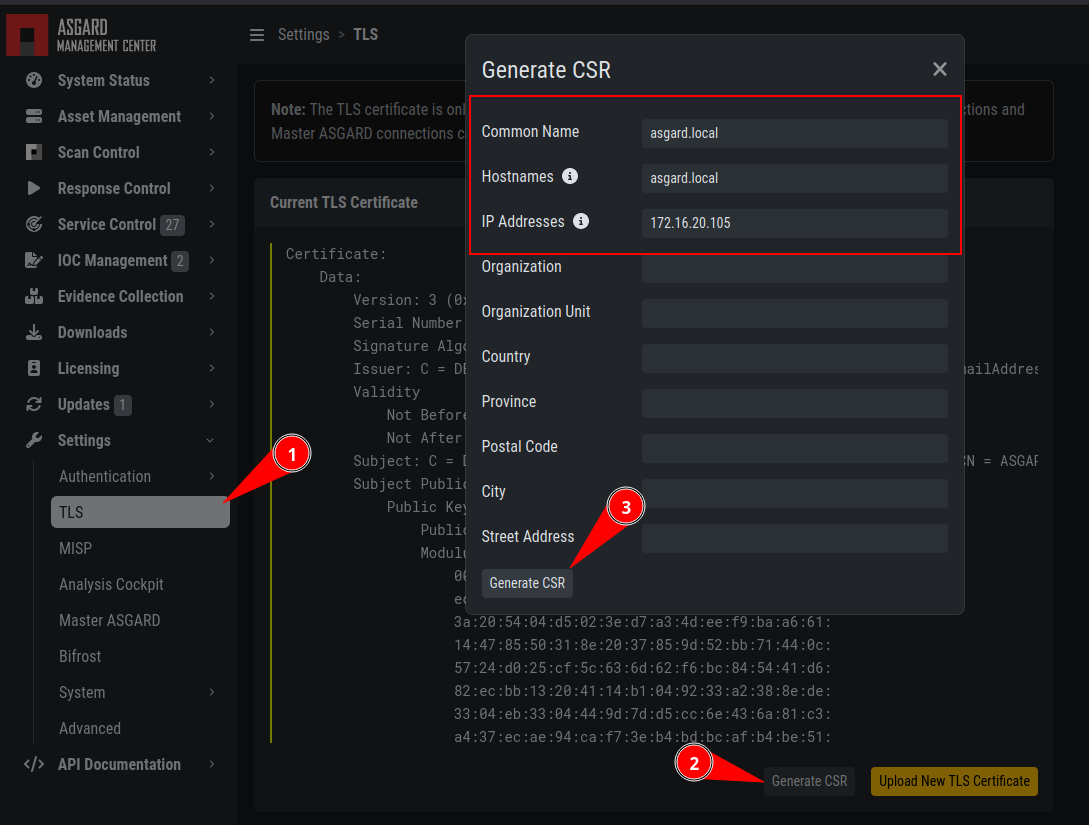
Generate a Certificate Signing Request (CSR)
To achieve the best possible compatibility with the
most common browsers, we recommend using the system's FQDN
in both fields Common Name AND Hostnames.
Generating a CSR on the command line is not supported.
The generated CSR can be used to generate a TLS certificate.
You can then upload this TLS certificate in the Settings > TLS section.

Upload a TLS Certificate
3.20.3. Manage Services
The individual ASGARD services can be managed in Settings >
System > Services. The services can be stopped or restarted
with the corresponding buttons in the Actions column.
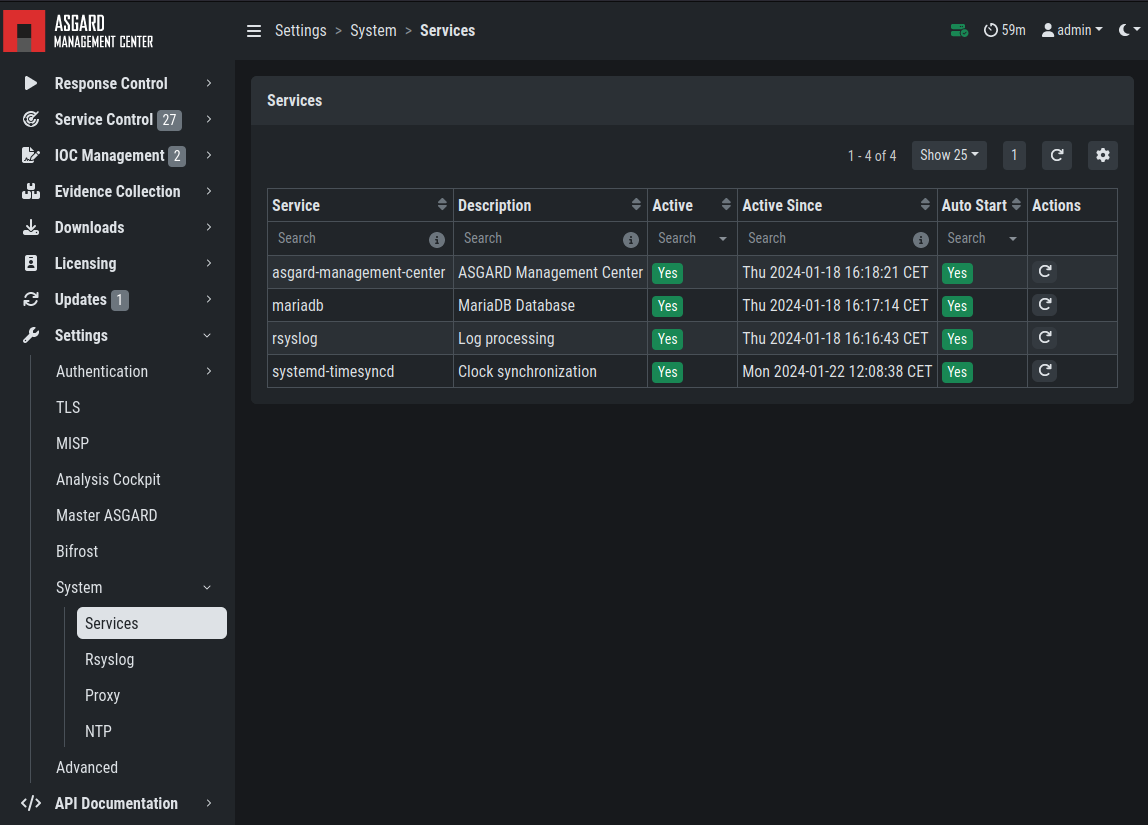
Manage Services
3.20.4. NTP Configuration
The current NTP configuration can be found in Settings >
System > NTP.
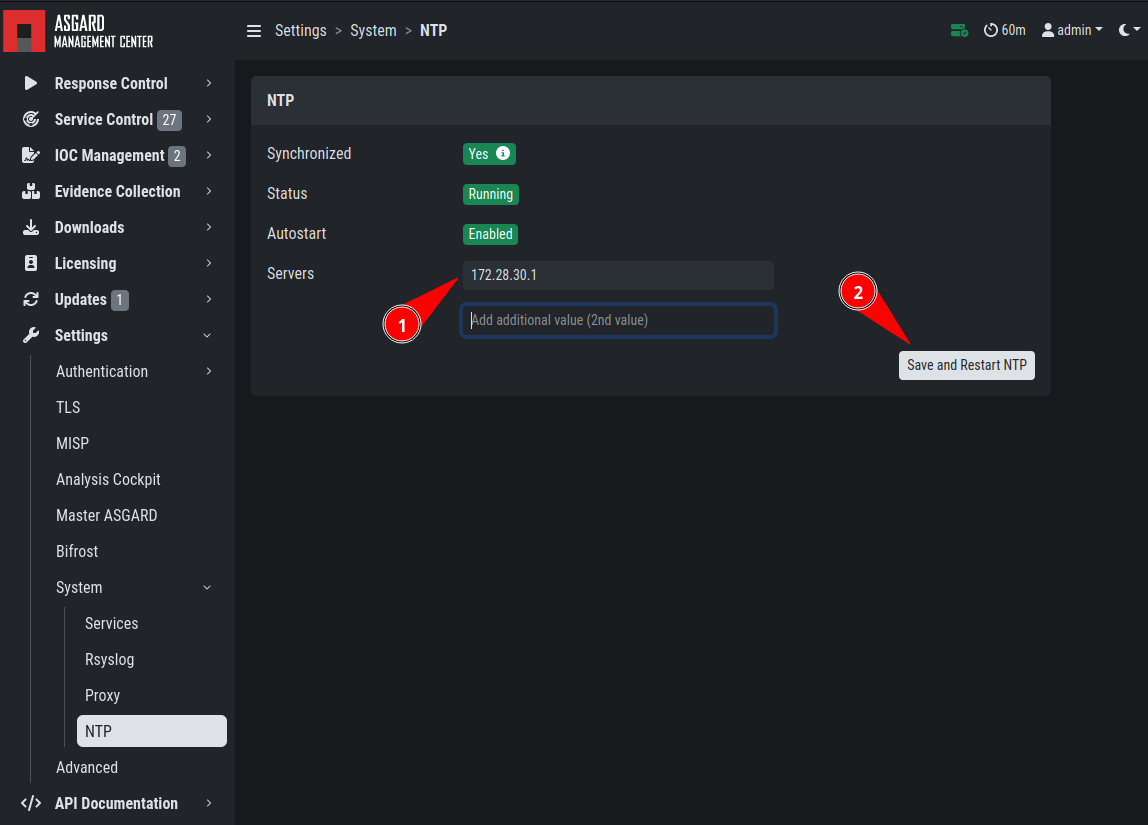
NTP configuration
You can add or delete NTP servers by adding/changing the values
in the text fields. After you finish your changes, click
Save and Restart NTP to save your changes.
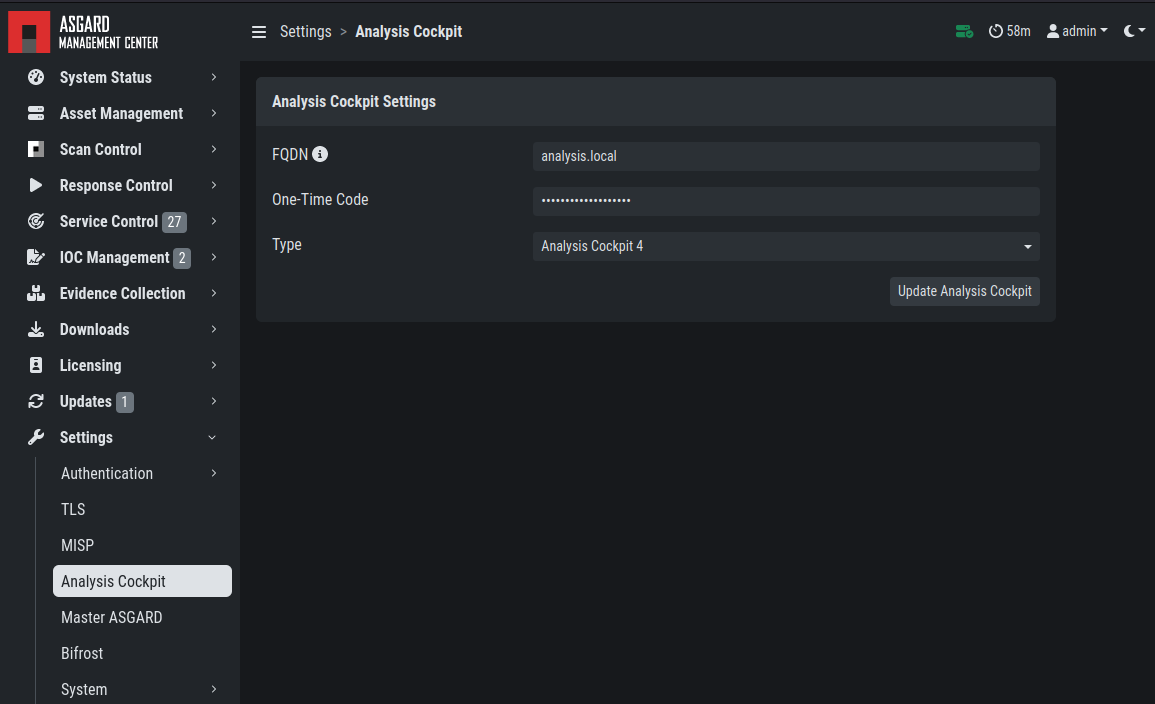
3.20.5. Link Analysis Cockpit
To connect to an Analysis Cockpit, enter the
respective hostname of the Analysis Cockpit (use the same
FQDN used during installation of the Analysis Cockpit) in
the field FQDN, enter the one-time code, choose the
type, and click Update Analysis Cockpit.
Linking the Analysis Cockpit
The Cockpit's API key can be found at Settings >
Link Products > Management Center.
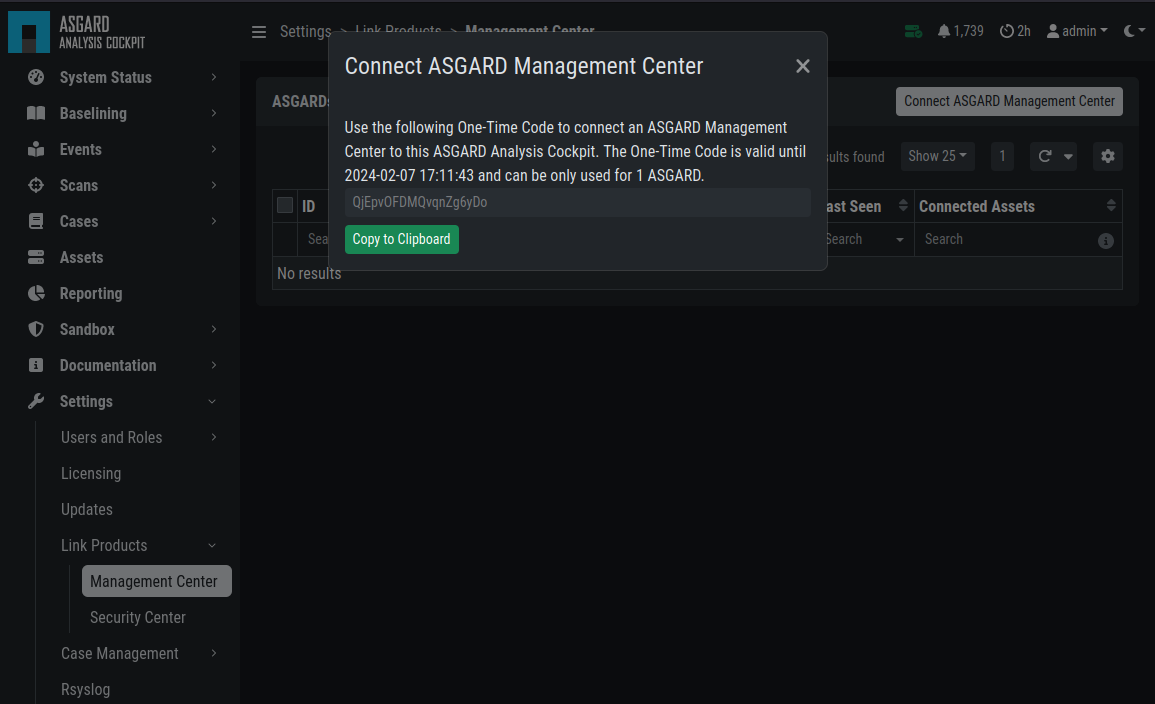
Analysis Cockpit API Key
ASGARD must be able to connect to the Analysis Cockpit
on port 443/TCP for a successful integration. Once connected,
the Cockpit will appear in ASGARD's System Status > Overview
section with the other connectivity tests.
Please wait up to five minutes for the status to
change on ASGARD's system status page. It changes from Not linked to Online.
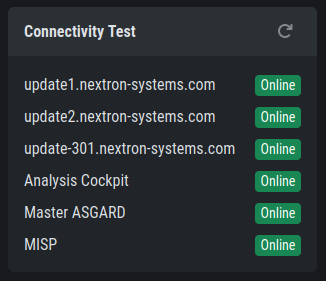
Connectivity Test
3.20.6. Link MASTER ASGARD
To control your ASGARD system with Master ASGARD, generate a one-time code and use it in the "Add ASGARD" dialog within the Master ASGARD frontend.
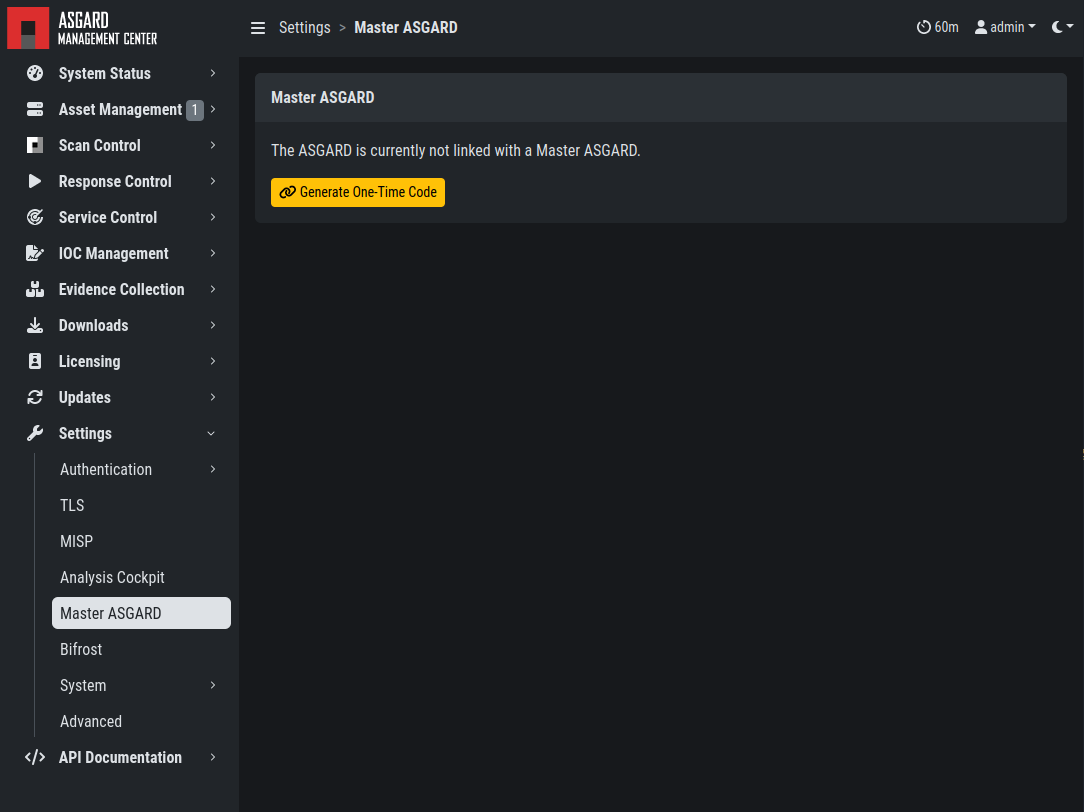
Link MASTER ASGARD
See Link ASGARD Systems with Master ASGARD for more information.
3.20.7. Link MISP
To connect to a MISP with your ASGARD Management Center,
navigate to Settings > MISP. Insert the MISP's address,
enter the API key, and click Test and Link MISP.
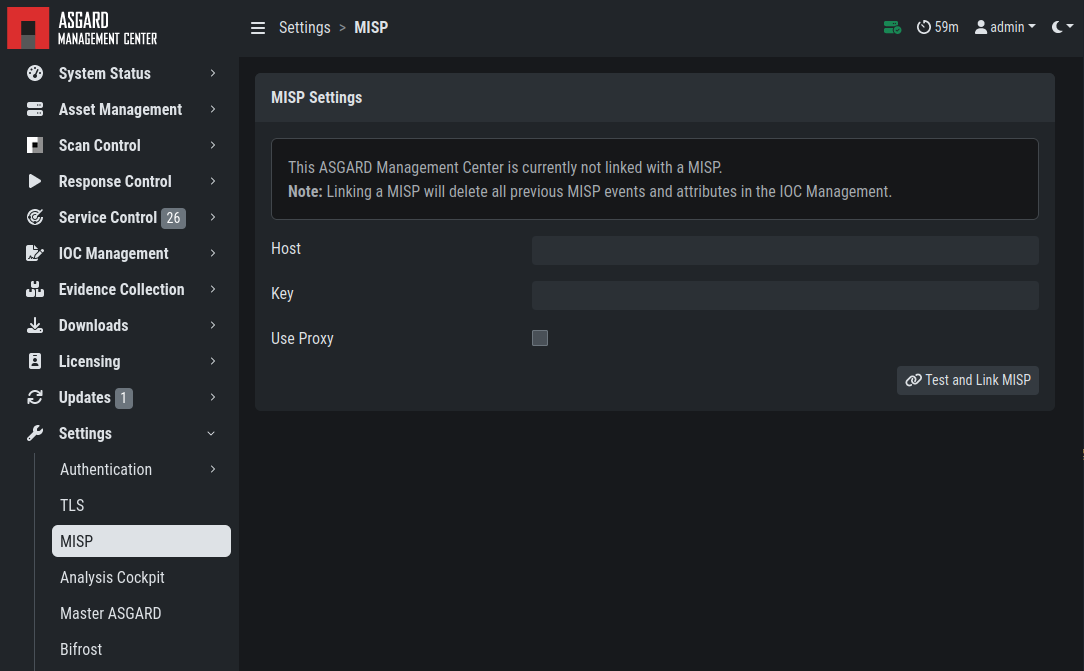
Linking a MISP to ASGARD
The MISP connectivity status is shown in the Overview section.
Please allow five minutes for the connection status to indicate the
correct status and for MISP rules to be downloaded and shown in
IOC Management > MISP > MISP Events.
MISP connectivity status
3.20.8. Change Proxy Settings
In this dialog, you can add or modify ASGARD's proxy
configuration. You need to restart the ASGARD
service afterwards from the Services tab.
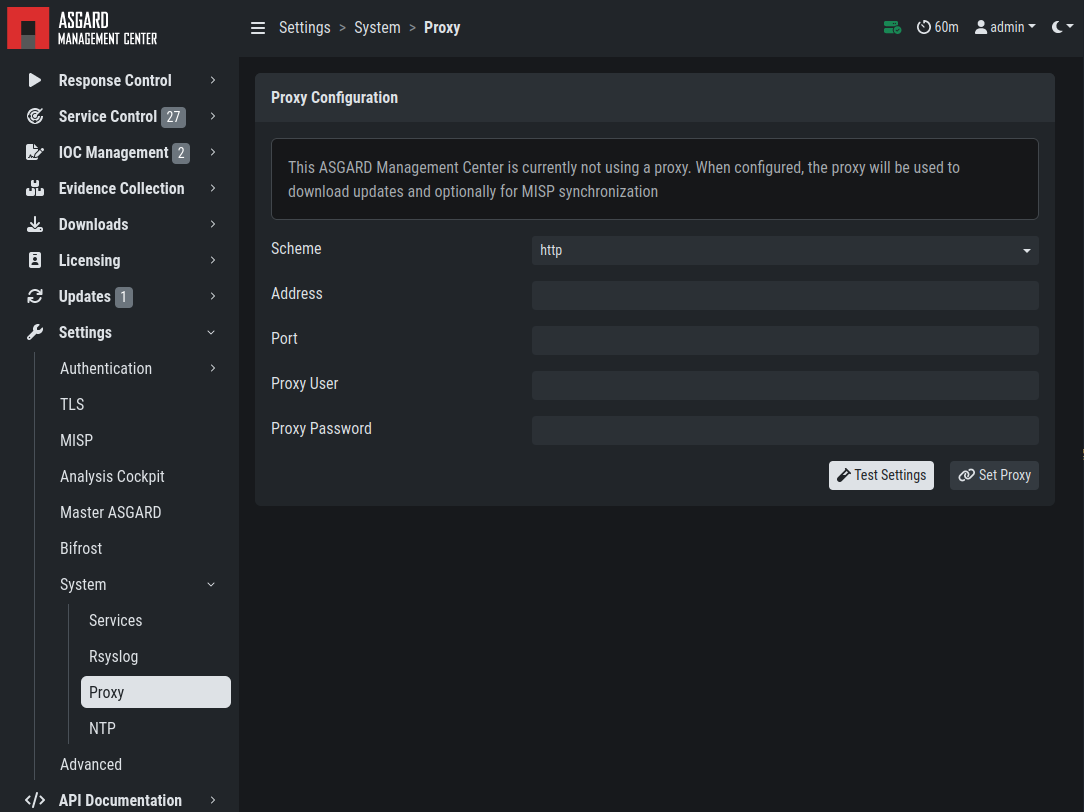
Change Proxy Settings