10. Appendix
10.1. Installing ASGARD Agent via Powershell Script
You can find a simple script to install the ASGARD Agent via Powershell. Place the installer and script in the same folder. Change the script as needed.
 1# Setting vars
 2$scriptpath = $MyInvocation.MyCommand.Path
 3$dir = Split-Path $scriptpath
 4$installer = "asgard2-agent-windows-amd64.exe"
 5$servicename = "asgard2-agent"
 6
 7# Checking if ASGARD Agent is already installed
 8if (Get-Service -Name $servicename -ErrorAction SilentlyContinue) {
 9    Write-Host "ASGARD Agent already installed, exiting"
10    exit 0
11} else {
12    Write-Host "ASGARD Agent not found, trying to install..."
13
14    # Install ASGARD Agent
15    Start-Process -Wait -FilePath "$dir\$installer" -WorkingDirectory $dir -WindowStyle Hidden -PassThru
16
17    # Timeout just to make sure the service is up and running
18    Timeout /T 15
19
20    # Checking service to see if agent was installed
21    if (Get-Service -Name $servicename -ErrorAction SilentlyContinue) {
22        Write-Host "Installed ASGARD Agent successfully"
23        exit 0
24    } else {
25        $Host.UI.WriteErrorLine("Could not install ASGARD Agent")
26        exit 1
27    }
28}
10.2. Deploy ASGARD Agents via SCCM
To deploy the ASGARD Agent (or any other .exe installer) via SCCM, you have to write a Powershell script with a few conditions to mark an installation correctly as successful or failed.
Please refer to Microsoft's Create applications in Configuration Manager .
 1# Get current directory
 2$scriptpath = $MyInvocation.MyCommand.Path
 3$dir = Split-Path $scriptpath
 4
 5# Run the installer
 6$installer = "asgard2-agent-windows-amd64.exe"
 7Start-Process -Wait -FilePath "$dir\$installer" -WorkingDirectory $dir -WindowStyle Hidden -PassThru
 8
 9# Timeout just to make sure the service is up and running
10Timeout /T 15
11
12# If the service exists, the script writes console output and exits with code 0
13# If the service does not exist, the script writes an error output and exits with code 1
14# See https://learn.microsoft.com/en-us/mem/configmgr/apps/deploy-use/create-applications#about-custom-script-detection-methods
15
16$servicename = "asgard2-agent"
17if (Get-Service -Name $servicename -ErrorAction SilentlyContinue) {
18    Write-Host "ASGARD Agent installed"
19    exit 0
20} else {
21    $Host.UI.WriteErrorLine("ASGARD Agent not installed")
22    exit 1
23}
Warning
This is just an example script which should work with SCCM. If you encounter any problems, refer to the link provided above for additional information.
SCCM Applications can also use a script to detect the Deployment. You can use this part of the script to detect if the installation was successful:
1$servicename = "asgard2-agent"
2if (Get-Service -Name $servicename -ErrorAction SilentlyContinue) {
3   Write-Host "ASGARD Agent installed"
4   exit 0
5} else {
6   $Host.UI.WriteErrorLine("ASGARD Agent not installed")
7   exit 1
8}
10.3. Broken file and folder permissions
The ASGARD Agent folder has in a normal installation specific permissions set. The ASGARD Agent checks regularly for broken permissions and tries to fix them. If for some reason this process fails, you have to check and change the permissions manually.
2023/03/31 12:02:35 ASGARD_THOR: Error: failed to repair permissions: set security info: Access is denied.
To do this we wrote a little PowerShell script which can help you with
this process. Please test the script before you deploy it in your
environment. To do this, you can leave the -WhatIf flag to see what
the script would do if the permissions are broken. If you are content
with the potential changes, remove the -WhatIf arguments. The script
needs administrative permissions.
 1$asgardAgent = "C:\Windows\System32\asgard2-agent"
 2$asgardAgentTemp = "C:\Windows\Temp\asgard2-agent"
 3
 4if (Get-Item -Path $asgardAgent | Get-Acl | where {$_.Access.IsInherited -eq $false}) {
 5    Write-Host "ASGARD Agent folder permission broken. Trying to fix: $asgardAgent"
 6    # Set the new Access Rule to inherit permissions
 7    $newAcl = Get-Acl -Path $asgardAgent
 8    $newAcl.SetAccessRuleProtection($false, $true)
 9    Set-Acl $asgardAgent -AclObject $newAcl -WhatIf
10}
11if (Get-Item -Path $asgardAgentTemp | Get-Acl | where {$_.Access.IsInherited -eq $false}) {
12    Write-Host "ASGARD Agent folder permission broken. Trying to fix: $asgardAgentTemp"
13    # Set the new Access Rule to inherit permissions
14    $newAcl = Get-Acl -Path $asgardAgentTemp
15    $newAcl.SetAccessRuleProtection($false, $true)
16    Set-Acl $asgardAgentTemp -AclObject $newAcl -WhatIf
17}
18get-childitem -path $asgardAgent -Recurse -Depth 1 | Get-Acl | where {$_.Access.IsInherited -eq $false} | % {
19    $fullPath = Convert-Path $_.Path
20    Write-Host "ASGARD Agent folder permission broken. Trying to fix: $fullPath"
21    # Set the new Access Rule to inherit permissions
22    $newAcl = Get-Acl -Path $_.Path
23    $newAcl.SetAccessRuleProtection($false, $true)
24    Set-Acl $_.Path -AclObject $newAcl -WhatIf
25}
Tip
After you changed the permissions of the asgard2-agent folder, the agent might correct the permissions again and set them accordingly. Only use this script if the agent is showing errors that permissions can not be set.
10.4. Installing ASGARD Agent on a Golden Image
If you want to implement the ASGARD Agent into your Golden Image, you can do this by following the steps in this section. Make sure to download the right Agent Installer package from your ASGARD.
You have two options to deploy an Agent on your Golden Image, with the first one being the easier method.
10.4.1. Offline Installation
Note
Before continuing, make sure the host can't reach your ASGARD.
In this method we make sure that the host system, which is being prepared
for the Golden Image, is either offline or can't reach the ASGARD. Go ahead
and install your ASGARD agent as you do normally. Once the installation is
done, you can stop the asgard2-agent service.
Windows (administrative command prompt):
C:\Windows\system32>sc stop asgard2-agent
Linux:
user@golden:~$ sudo systemctl stop asgard2-agent.service
You ASGARD Agent should be ready now. You have to make sure that the Agent
is not communicating with your ASGARD during the whole process. If the agent
is for some reason communicating with the ASGARD and creating an Asset
Request, make sure that you stop the asgard2-agent service again and
inspect the following file:
Windows:
C:\Windows\System32\asgard2-agent\asgard2-agent.yamlLinux:
/var/lib/asgard2-agent/asgard2-agent.yaml
The file should not contain the marked lines in the next example. If both lines exist, make sure you delete them and save the file. Make also sure to deny the Asset Request in your ASGARD to avoid confusion:
1host: yourasgard.domain.local:443
2token: +uW6HrF3kxmLNZYqKTKuZt [...]
3registered: true
4proxy: []
5system_proxy: false
6labels: []
7write_log: false
Warning
Your Golden Image will not work if the two lines in the asgard2-agent.yaml
file exist, it instead will create a Duplicate Asset. So make sure that
they are not present when you are creating the Golden Image!
10.4.2. Online Installation
If for some reason you can not prevent your host, which is being used for
the Golden Image, to communicate with your ASGARD, then follow the next
steps. Go ahead and install your ASGARD agent as you do normally. Once the
installation is done, you can stop the asgard2-agent service.
Windows (administrative command prompt):
C:\Windows\system32>sc stop asgard2-agent
Linux:
user@golden:~$ sudo systemctl stop asgard2-agent.service
Once the service is stopped, we have to alter the configuration file of the
agent. This is necessary because your agent will have communicated with your
ASGARD by now, thus having generated an token, which should be unique.
If you would create your Golden Image now, you would have the
systems, installed with the Golden Image, appear as Duplicate Asset (see
Duplicate Assets Remediation).
Open the asgard2-agent.yaml file and delete the marked lines in our example.
Windows:
C:\Windows\System32\asgard2-agent\asgard2-agent.yamlLinux:
/var/lib/asgard2-agent/asgard2-agent.yaml
1host: yourasgard.domain.local:443
2token: +uW6HrF3kxmLNZYqKTKuZt [...]
3registered: true
4proxy: []
5system_proxy: false
6labels: []
7write_log: false
After you deleted the two lines and saved the file, your host is ready. Make
sure those two lines are not present, as well as your asgard2-agent service
is still not running. We delete the token because it is unique to ASGARD.
If two agents are presenting the same token, they will be flagged as duplicate
assets. The registered value tells the agent if it has to send a new asset
request or not. Once it is set to true it would not send a new request.
Hint
Make sure to deny the Asset Request, which we just created while installing the agent on our host, in ASGARD. This is to avoid confusion down the road.
10.5. Install TLS certificates on ASGARD and MASTER ASGARD
There are several methods to sign the ASGARD generated CSR request. This section describes the two most common procedures.
10.5.1. Use Case 1 - CSR Signing with a Microsoft Based CA
Open the Certificate Authority snap-in within Windows Server

certsrv – Microsoft Certification Authority Main Page
Right click your CA >> All Tasks >> Submit new request

certsrv – Submit new request
Locate and open the signing request file we've saved in previous steps
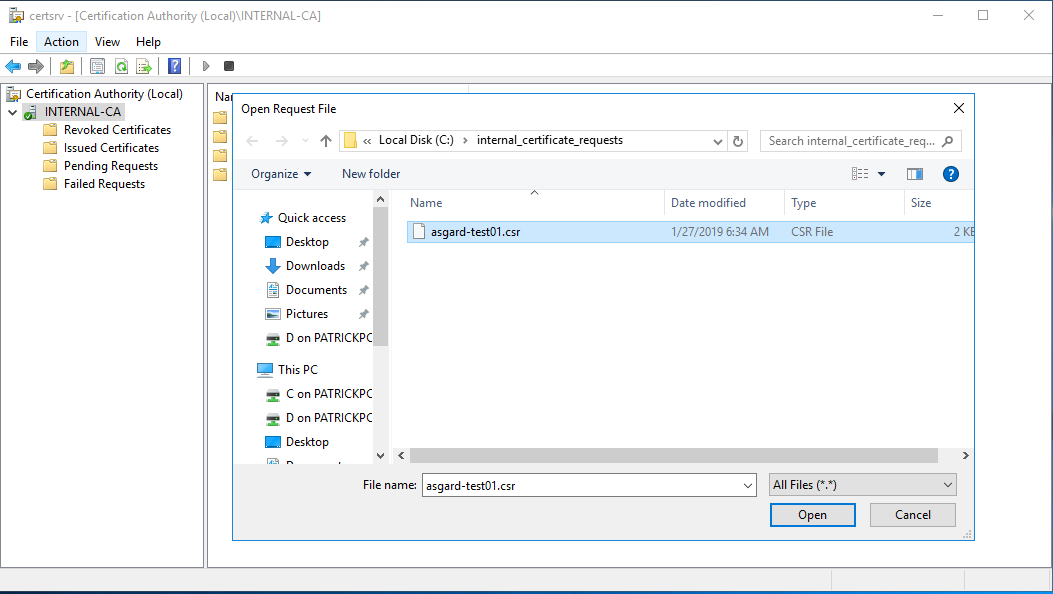
certsrv – Locate the CSR to be signed
Navigate to the "Pending Requests" within your CA snap-in and right click the imported CSR >> All Tasks >> Issue

certsrv – Issue the certificate
Once the certificate has been issued, it will be located under "Issued Certificates"
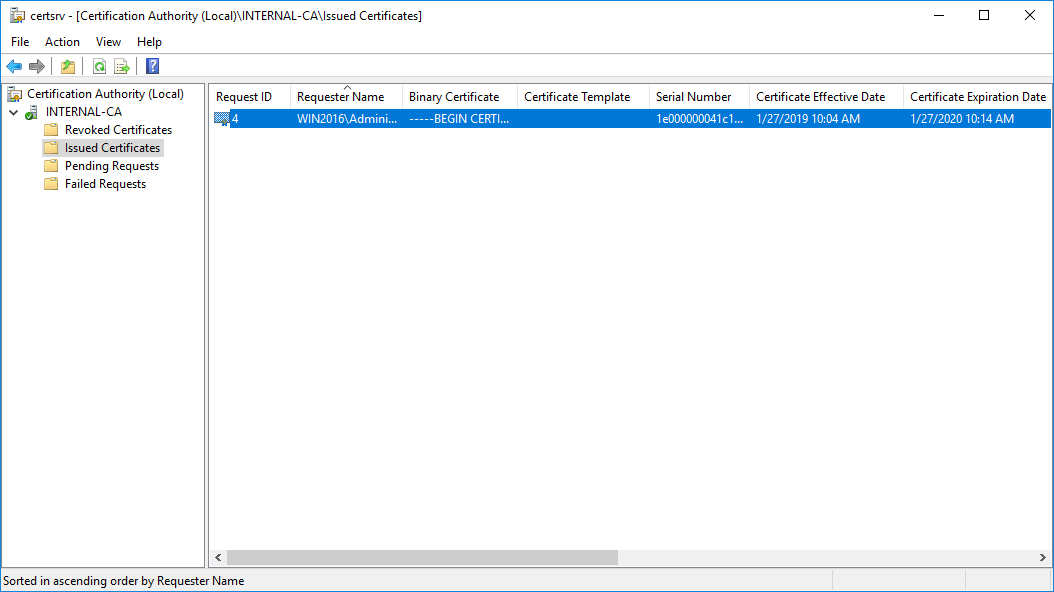
certsrv – Locate issued certificate
Right click on the issued certificate and click open

certsrv – Export certificate
Inspect the information of the Certificate and continue to the next step, if the presented data is correct.
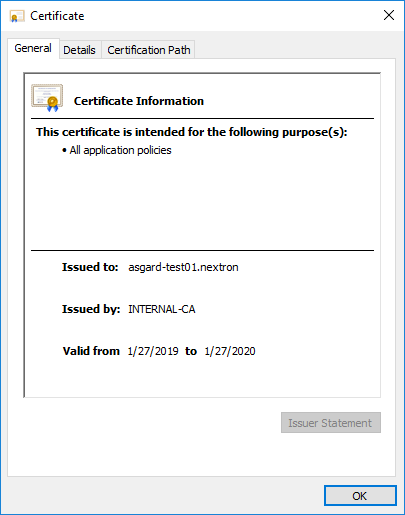
certsrv – Export certificate
Check that the generated certificate has a status of OK

certsrv – Export certificate
Navigate to the Details tab and click "Copy to File…"
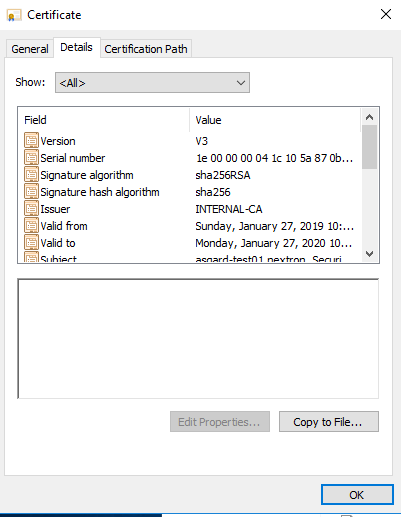
certsrv – Export certificate
On the Certificate Export Wizard – click Next
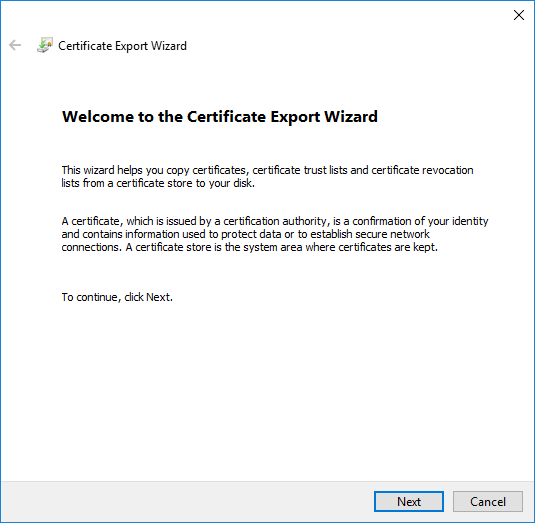
certsrv – Export certificate
Select Base-64 encoded X.509(.CER) and click Next
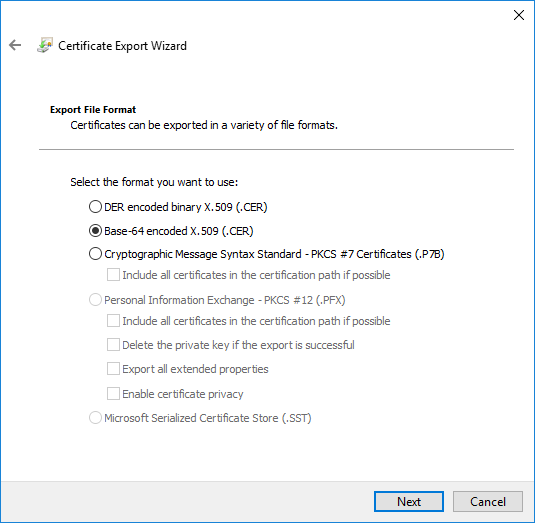
certsrv – Export certificate
Choose an output location and click Next

certsrv – Export certificate
Click Finish - Once the confirmation message box pops up, click OK
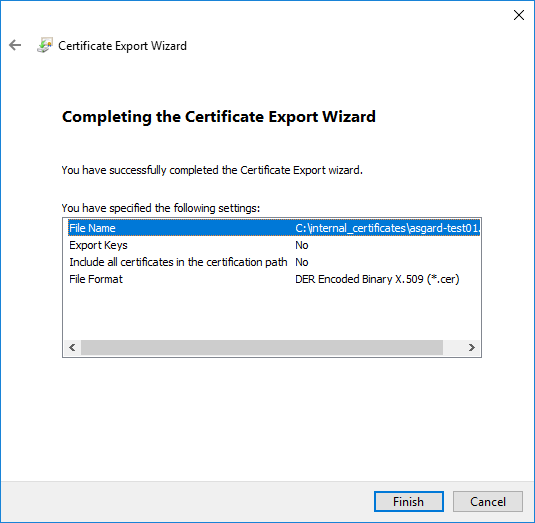
certsrv – Export certificate
Navigate to Settings >> TLS.
On the bottom of the page click Upload TLS Certificate and select the
exported certificate from the previous step.

ASGARD Certificate Import
If all steps were followed, a message box should pop up indicating that the certificate was successfully installed.
Navigate to Settings >> Services and restart the ASGARD 2 Service by clicking Restart button.

ASGARD service restart
Please take into consideration that it could take a few minutes until the ASGARD Service is restarted successfully.
After the service has been successfully restarted, the installed certificate is shown in the browser.

ASGARD certificate installation check
10.5.2. Use Case 2 - CSR Signing with an OpenSSL Based CA
Warning
In order to avoid security warnings [1] on some browsers, the CA signing process needs to ensure to copy all Subject Alternative Name (SAN) from the CSR to the signed Certificate.
There are two ways of doing this while singing the CSR via openssl.
The first method of including all extensions from the CSR to the new certificate,
is via the openssl.cnf file, by uncommenting the copy_extensions attribute.
The location of the openssl.cnf file depends on your system. On our test system, this
file was located at /etc/pki/tls/openssl.cnf.
Warning
Please make sure to comment the line out again once you are done with singing your CSR.
Example:
 80####################################################################
 81 [ CA_default ]
 82
 83 dir             = ./demoCA                # Where everything is kept
 84 certs           = $dir/certs              # Where the issued certs are kept
 85 crl_dir         = $dir/crl                # Where the issued crl are kept
 86 database        = $dir/index.txt          # database index file.
 87 #unique_subject = no                      # Set to 'no' to allow creation of
 88                                           # several certs with same subject.
 89 new_certs_dir   = $dir/newcerts           # default place for new certs.
 90
 91 certificate     = $dir/cacert.pem         # The CA certificate
 92 serial          = $dir/serial             # The current serial number
 93 crlnumber       = $dir/crlnumber          # the current crl number
 94                                           # must be commented out to leave a V1 CRL
 95 crl             = $dir/crl.pem            # The current CRL
 96 private_key     = $dir/private/cakey.pem  # The private key
 97
 98 x509_extensions = usr_cert                # The extensions to add to the cert
 99
100 # Comment out the following two lines for the "traditional"
101 # (and highly broken) format.
102 name_opt        = ca_default              # Subject Name options
103 cert_opt        = ca_default              # Certificate field options
104
105 # Extension copying option: use with caution.
106 copy_extensions = copy
107
108 [...]
The second method of including all extensions from the CSR to the new certificate,
is via an extension file (for example asgard-test01.ext) containing all your subjectAltName entries.
This tells openssl to use a extension for signing the CSR. In our case the extension contains a list of
subjectAltName values.
To do this, place a file with your subjectAltName entries in the same folder of your CSR. The contents of this file
look something like the following example. Values after subjectAltName = should be equal to the
values of your CSR:
root@ca:~# cat asgard-test01.ext
subjectAltName = DNS:asgard-test01.nextron, IP Address:172.28.28.101
The content should be identical to the values you set in your CSR. You can inspect those with the following command:
root@ca:~# openssl req -in asgard-test01.csr -noout -text                                                                                                                [31/146]
Certificate Request:
 Data:
     Version: 1 (0x0)
     Subject: C = DE, ST = Hesse, O = Nextron, OU = Security IT, CN = asgard-test01.nextron
     Subject Public Key Info:
         Public Key Algorithm: rsaEncryption
             Public-Key: (4096 bit)
             Modulus:
                 00:cb:74:c9:ed:4e:4d:db:39:7b:e0:dc:bb:55:d6:
                 [...]
                 c2:9f:69
             Exponent: 65537 (0x10001)
     Attributes:
         Requested Extensions:
             X509v3 Subject Alternative Name:
                 DNS:asgard-test01.nextron, IP Address:172.28.28.101
Prepare the CA certificate, CA private key and the certificate signing request (and optionally your extension file, if you chose method 2).
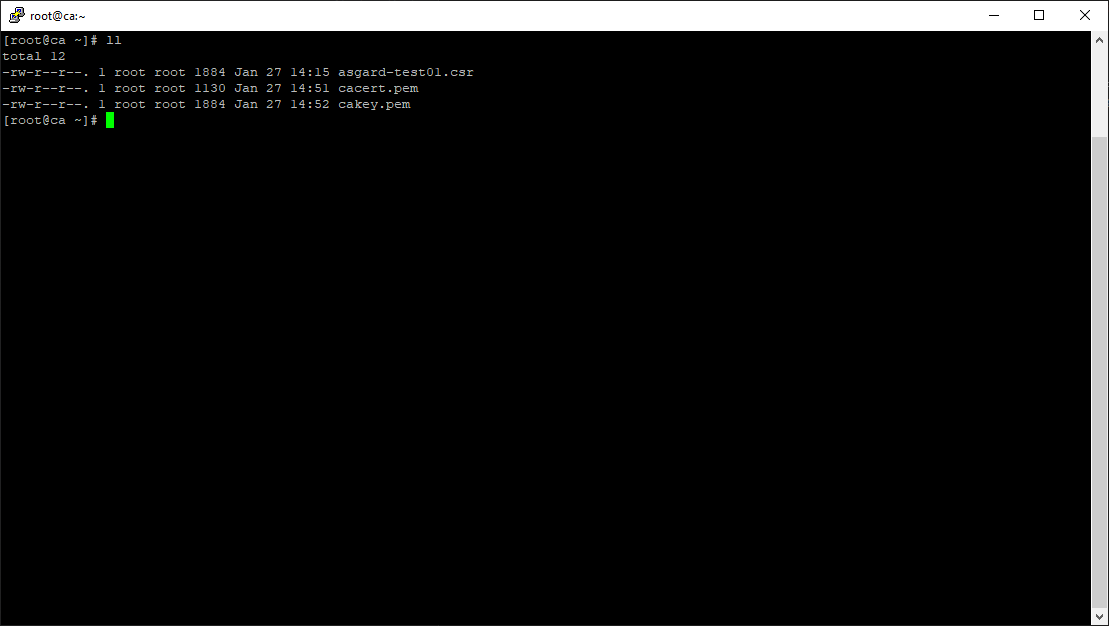
CSR and signing Certificates preparation
Execute/adapt the following command depending on the method you chose before:
First method:
root@ca:~# openssl ca -cert cacert.pem -keyfile cakey.pem -in asgard-test01.csr -out asgard-test01.crt -days 3650
Using configuration from /etc/pki/tls/openssl.conf
Enter pass phrase for cakey.pem:
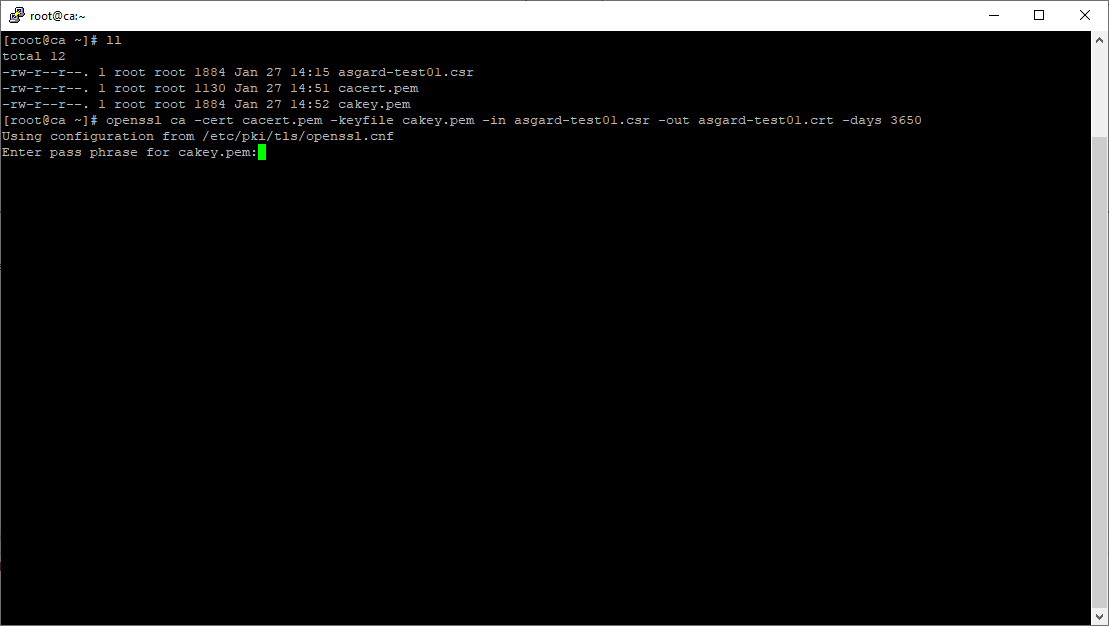
Certificate signing command
Second method:
root@ca:~# openssl ca -cert cacert.pem -keyfile cakey.pem -in asgard-test01.csr -out asgard-test01.crt -days 3650 -extfile asgard-test01.ext
Using configuration from /etc/pki/tls/openssl.conf
Enter pass phrase for cakey.pem:
Check that the request matches the signature
Signature ok
Certificate Details:
        Serial Number: 1 (0x1)
        Validity
            Not Before: Feb 23 09:58:10 2023 GMT
            Not After : Feb 20 09:58:10 2033 GMT
        Subject:
            countryName               = DE
            stateOrProvinceName       = Hesse
            organizationName          = Nextron
            organizationalUnitName    = Security IT
            commonName                = asgard-test01.nextron
        X509v3 extensions:
            X509v3 Subject Alternative Name:
                DNS:asgard-test01.nextron IP Address:172.28.28.101
Certificate is to be certified until Feb 20 09:58:10 2033 GMT (3650 days)
Enter the passphrase for your CA's private key

Signing procedure
Confirm that the data contained in the CSR is accurate and confirm the signing of the request to the CA.
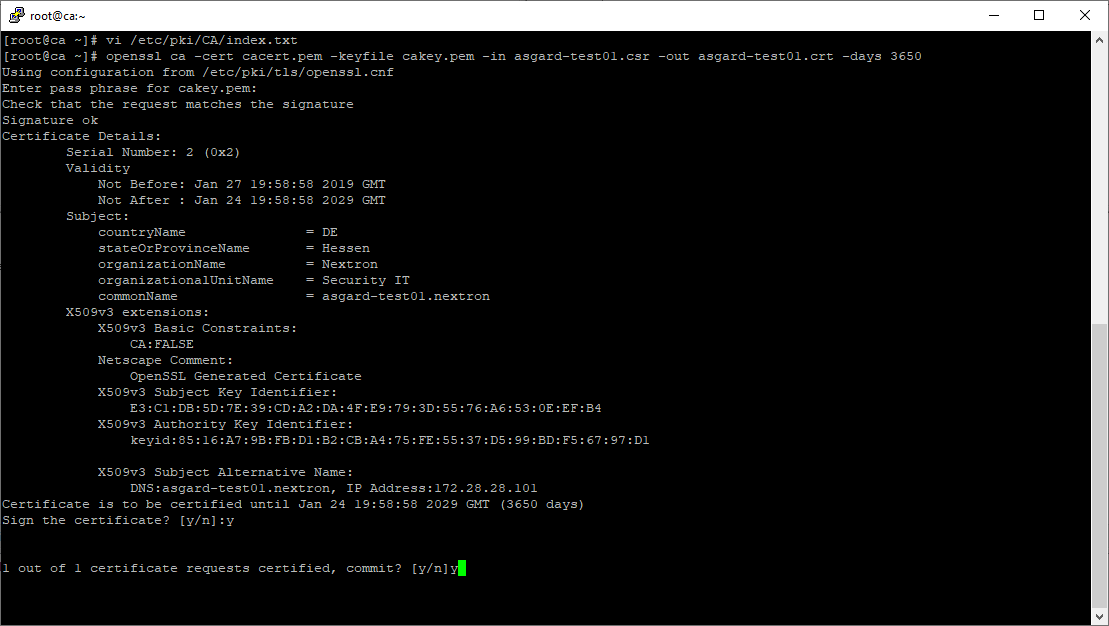
Signing procedure – Checking data is accurate
Once confirmed commit the changes to your local DB.
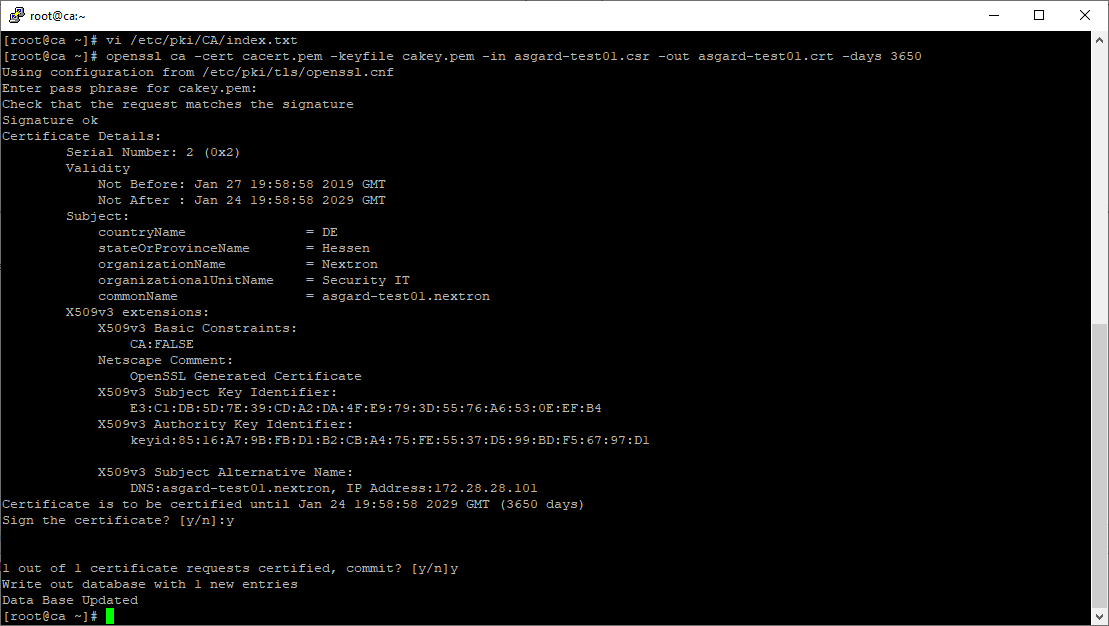
Signing procedure – Committing changes
As a result, the signed certificate will be available with the indicated filename.
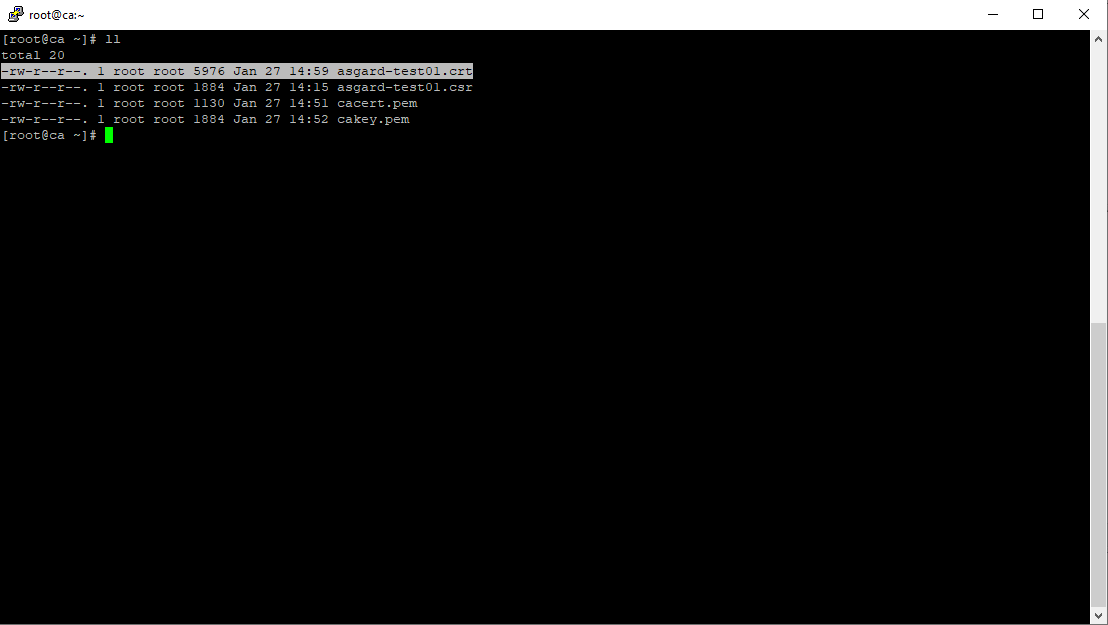
Signing procedure – Locating the generated certificate
As a last step, the generated certificate can be imported following the TLS Certificate Installation steps.
10.6. Agent Migration from ASGARD v1 to v2
This document will guide customers with an existing ASGARD version 1.x to perform an agent migration to ASGARD version 2.x.
The new release of ASGARD Management Center brings not only a redesigned interface, but also major changes in the architecture and usability, making it faster, more robust and easier to use.
10.6.1. Prerequisites
You need to prepare some data prior to starting the migration.
10.6.1.1. Account Data and Network Access
Ensure you have access and credentials to the following systems, as well as connectivity as follows:
ASGARD Management Center version 1
Administrative Web User
Credentials for the ssh user: bsk
ASGARD Management Center version 2
Administrative Web User
Credentials for the ssh user: nextron
Connectivity between ASGARD 1 and ASGARD 2
Required only if new agents are transferred via SCP
Client/Server System(s) connected to ASGARD v1 needs connectivity to ASGARD v2
Access to a new update server
update1.nextron-systems.com
update2.nextron-systems.com
update3.nextron-systems.com
For a detailed and up to date list of our update and licensing servers, please visit https://www.nextron-systems.com/hosts/.
10.6.2. Migration
Identify the agents you want to migrate and perform the following actions on each of the them.
10.6.2.1. Identify the system to be migrated
Connect to your ASGARD Management Center version 1.x and identify the system you plan to migrate.

Overview of Assets
10.6.2.2. Transfer the new ASGARD Windows agent to the ASGARD version 1.x Server
Connect to your new ASGARD version 2.x server over SSH and transfer the new windows agent to the old ASGARD version 1.x server.
This step will allow the old ASGARD version 1.x server to distribute the new agent.
Note
In this step you require the password of your ASGARD version 1.x and your ASGARD version 2.x
10.6.2.2.1. Connect to ASGARD version 2 over SSH
user@unix:~$ ssh nextron@asgard-v2.domain
nextron@asgard-v2.domain's password:
nextron@asgard-v2:~$
10.6.2.2.2. Copy the new agent(s) to ASGARD version 1.x
You will find all new agents under /var/lib/nextron/asgard2/installer,
this example will cover a migration of a windows x64 system. Please see
the following chapters for Linux/macOS hosts.
nextron@asgard-v2:~$ sudo su -
[sudo] password for nextron:
root@asgard-v2:~# cd /var/lib/nextron/asgard2/installer/
root@asgard-v2:~# scp asgard2-agent-windows-amd64.exe bsk@asgard-v1.domain:
bsk@asgard-v1.domain's password:
asgard2-agent-windows-amd64.exe                                100% 8380KB 116.9MB/s   00:00
root@asgard-v2:~#
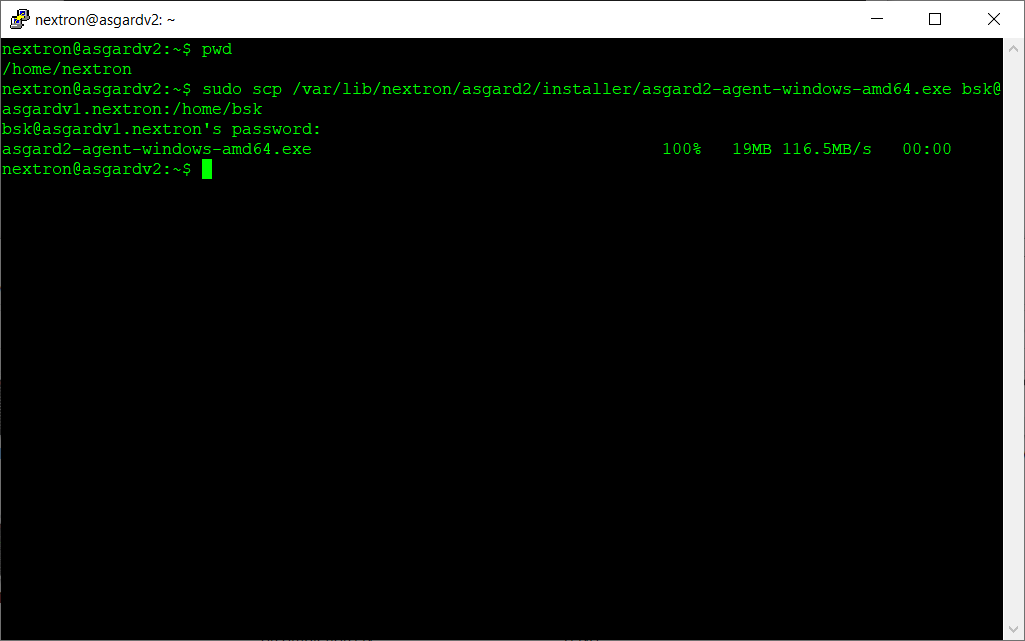
New agent distribution to old ASGARD v1.x Server
10.6.2.2.3. Check that the new agent has been transferred to the old ASGARD version 1.x Server
user@unix:~$ ssh bsk@asgard-v1.domain
bsk@asgard-v1.domain's password:
bsk@asgard-v1:~$ ls -l
total 8380
-r--r--r-- 1 bsk bsk 8580773 Feb 23 09:14 asgard2-agent-windows-amd64.exe
bsk@asgard-v1:~$ chmod 744 asgard2-agent-windows-amd64.exe
bsk@asgard-v1:~$ ls -l
total 8380
-rwxr--r-- 1 bsk bsk 8580773 Feb 23 09:14 asgard2-agent-windows-amd64.exe

Listing of agents on ASGARD version 1.x
10.6.2.2.4. Sign the new agents
bsk@asgard-v1:~$ sudo grr_config_updater upload_exe --file asgard2-agent-windows-amd64.exe --dest_path aff4:/asgard-v1.domain/asgard2-agent-windows-amd64.exe --platform windows --arch amd64
Please modify the aff4:/ part of the command above to reflect your hostname.
aff4:/<your-host-fqdn>/asgard2-agent-windows-amd64.exe

Signing of executable(s)
Note
Remember to save the --dest_path. In our case it is aff4:/asgardv1.nextron/asgard2-agent-windows-amd64.exe
10.6.2.2.5. Switch to Advanced Mode within GRR
Open your ASGARD version 1.x web interface and navigate to the
Response Control view. You will be prompted for a username and password,
use the same login information as you use to log into ASGARD.
Once you reach the Response Control Section (GRR) please navigate to the top right corner (settings gear) and switch to the Advanced Mode. Apply the settings.
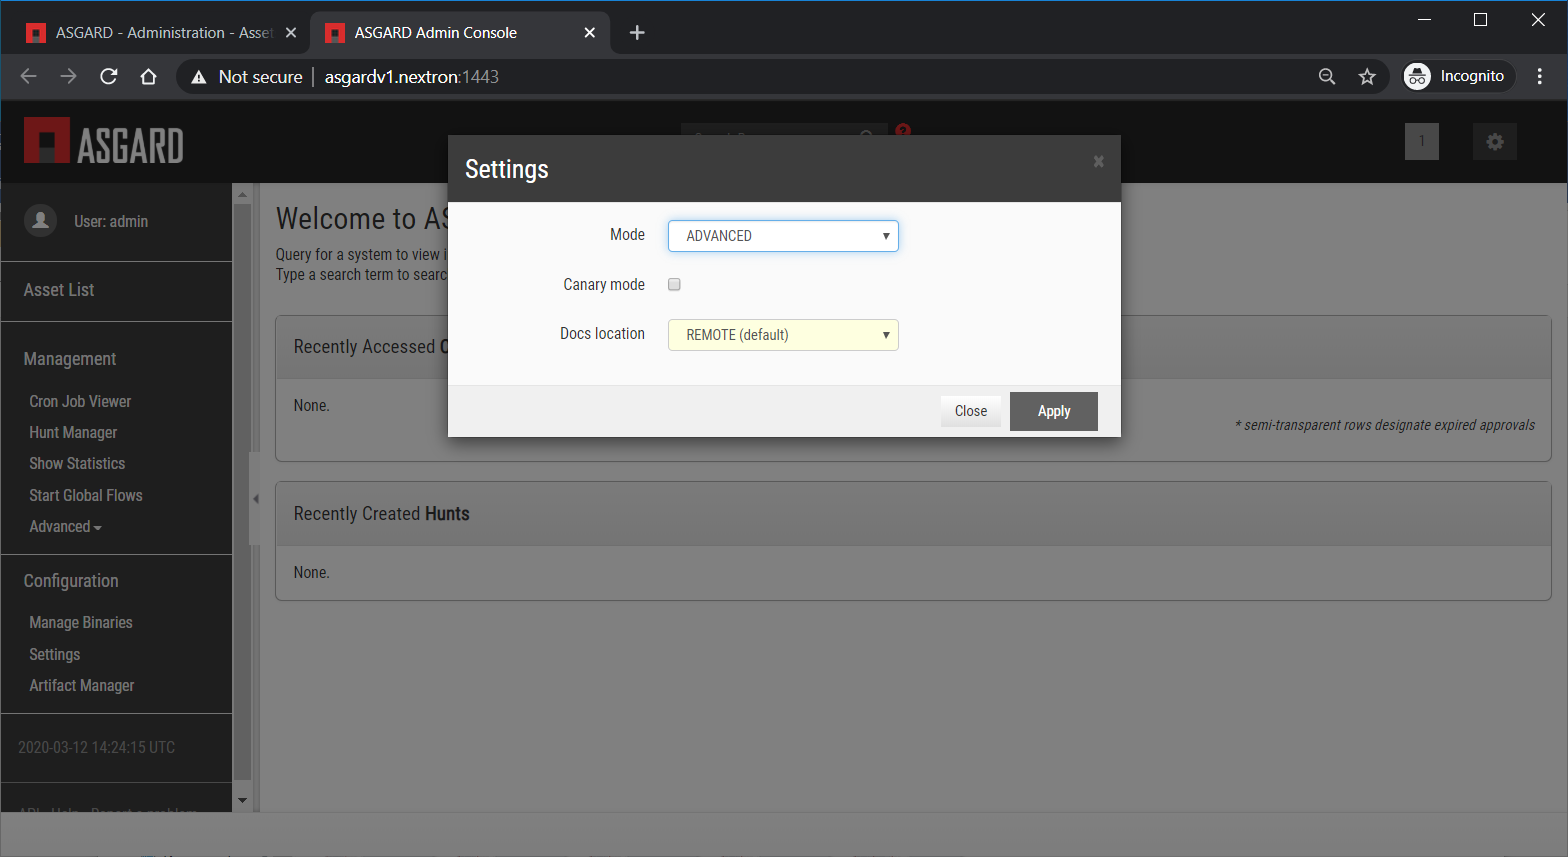
GRR Advanced Mode
10.6.2.2.6. Asset Selection
Navigate to the Asset List section on the left menu and select
the asset you want to migrate. A click on the asset will select it.
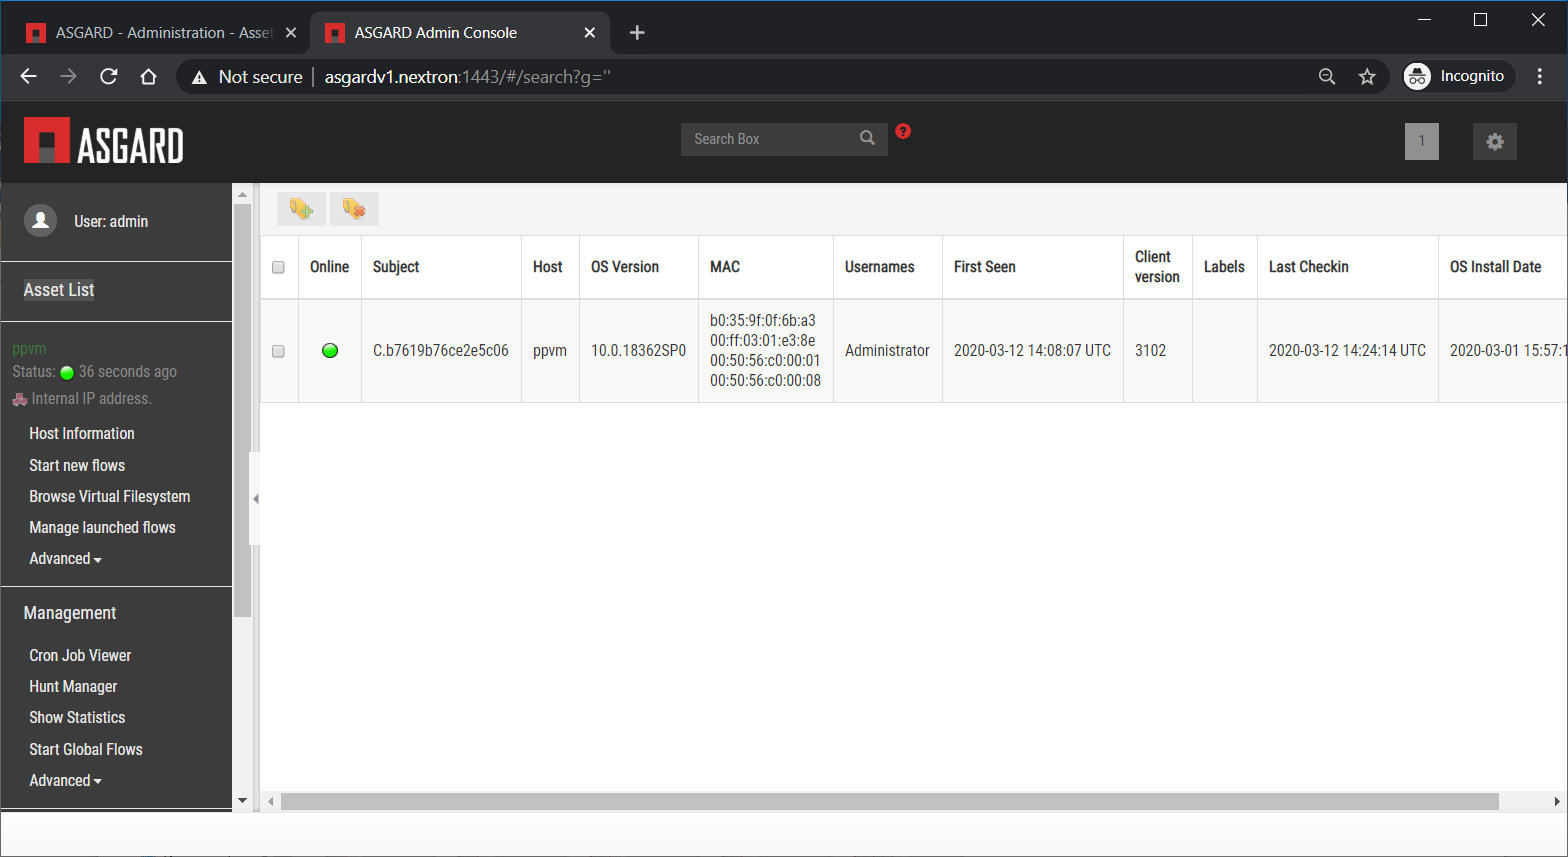
Asset List view
Once the asset has been selected (clicking on it), navigate to the Start new flows section, located on the left menu.

Start new flow
10.6.2.2.7. Install the new ASGARD2 Agent
In order to install the new agent, we will need to expand
the Administrative folder and select Launch Binary.
We will be requested to put in a binary, please use the binary name we gathered/created in step Sign the new agents and click Launch.

Launch Binary
The used binary name was extracted from step Sign the new agents.
In this example aff4:/asgardv1.nextron/asgard2-agent-windows-amd64.exe

Confirmation after launching the binary
After approximately 10 minutes, the binary will be executed and
installed on the selected system. The status can be retrieved by
navigating to the Manage launched flows section on the left menu.
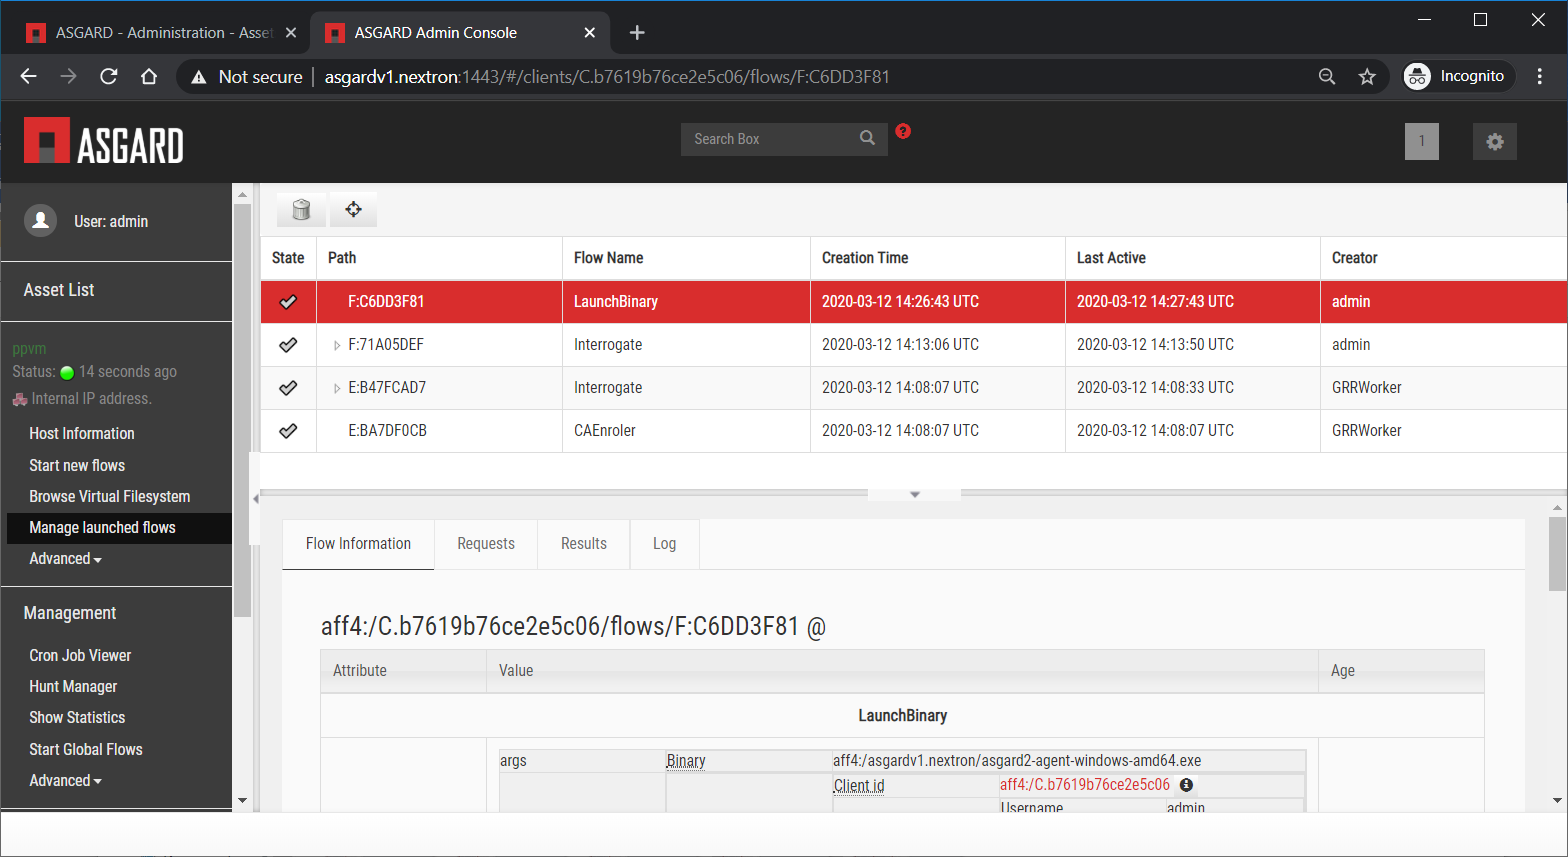
Manage launched flows
10.6.2.2.8. Linux Hosts
For migrating Linux hosts please create a shell script and follow the above procedure to deploy it.
An example shell script for Debian based systems could look like this:
1#!/bin/bash
2cd /tmp
3wget -O agent-linux.deb --no-check-certificate https://asgardv2:8443/agent-installers?asgard2-agent-linux-amd64.deb
4dpkg -i /tmp/agent-linux.deb
5rm -f /tmp/agent-linux.deb
Save this script in your ASGARD v1.x and sign/upload it to GRR as described in section Sign the new agents , afterwards you will be able to launch a HUNT to your connected Linux Systems.
Note
Please bear in mind that the above script will work only for
Ubuntu/Debian systems and needs to be adapted for Redhat/CentOS systems.
10.6.2.2.9. MacOS Hosts
For migrating macOS hosts please create a shell script and follow the above procedure to deploy it.
An example shell script for macOS based systems could look like this:
1#!/bin/bash
2cd /tmp
3curl -o agent-darwin.pkg -k "https://asgardv2.bsk:8443/agent-installers?asgard2-agent-macos-amd64.pkg"
4sudo installer -pkg /tmp/agent-darwin.pkg -target /
5rm -f /tmp/agent-darwin.pkg
Save this script in your ASGARDv1 and sign/upload it to GRR as
described in section Sign the new agents,
afterwards you will be able to launch a HUNT to your connected macOS Systems.
10.6.3. Migration check and completion
After the above steps have been executed, the agent should be reporting to the new ASGARD version 2.x server.
At this moment the system will have 2 agents installed, the agent reporting to ASGARD version 1.x and the agent reporting to ASGARD version 2.x
10.6.3.1. Accept the agent request
Once a new agent is reporting to ASGARD version 2.x it will automatically create a request to be part of the same. We need to accept that request.
Log into ASGARD version 2.x and navigate to the Asset Management – Requests.

Asset Management (Requests)
Select the migrated system and click on the top right on Accept.
This should place the system in the Assets tab.

Asset Management (Assets View)
10.6.4. Frequently Asked Questions
This section will cover frequent questions regarding the migration.
10.6.4.1. Will there be any problem running both agents (v1, v2) at the same time?
There are no known issues running both agents at the same time. The new ASGARD v2 agent is more lightweight and has better performance. The expected RAM utilization in idle mode demonstrated in our tests puts the new agent in a very good position, consuming only 1 MB.
10.6.4.2. Will I need more resources for my new ASGARD v2 server?
Please refer to Hardware Requirements for specific sizing. The overall tests performed highlight that both, server and agents, have better performance, which will allow more agents to be management per ASGARD (compared to version 1).
10.6.4.3. Can I import my memory dumps and file collections made on ASGARD v1?
Unfortunately, importing memory dumps and/or file collections made on ASGARD v1 is not possible.